How To Record Electric Guitar: Understanding Mics and Mic Placement

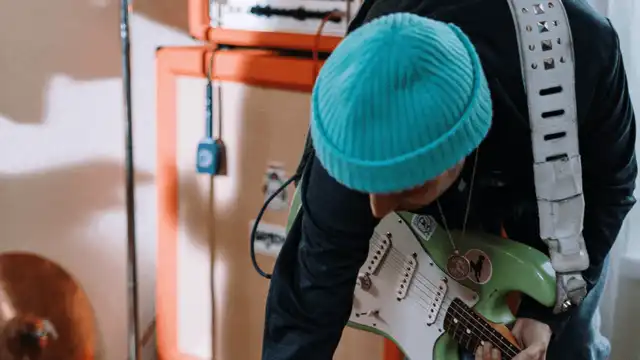
We hate to break it to you, but after you’ve finally landed on the best guitar and amp combination to give you that ‘holy grail’ of tone you’ve always heard in your head, you really may not be done...yet.
Here’s the next trick—figuring out how to record electric guitar and get that sound down on tape (well...not that ‘tape’ really exists all that much anymore in this digital techno-type age we live in today, but you get the point—work with us here...).
And there’s where a whole new set of challenges lie—finding the best way to record your electric guitar. It may sound simple enough...just get a good mic, just put it in front of that sweet sounding amp, and just press ‘RECORD’. Well, it sure would be nice if it was just that easy. But, as with a lot of things, most often it isn’t.
So what are you supposed to do?
Learning how to record electric guitar is an art, and being good at it comes with a fair amount of experience. To help gain that experience, you need a solid understanding of the tools and techniques needed to get your recorded sound as good as it can be.
Here’s where we come in to help! We’re going to dig into the differences between several microphone types, which one(s) to use under which circumstance(s), and also delve a little bit into the science of mic placement itself to give you the basic building blocks of how to record electric guitar. In future articles, we will cover outboard gear, plugins, basic EQ and compression—there is a lot to know when it comes to recording. But undoubtedly mics and mic placement—which we will cover today—are the best place to start.
Editor's Note: Do you already have a solid grasp on how to record electric guitar using different mics and mic techniques? Well for more advanced folks like yourself, skip to our free Ultimate Guitar Tone Guide which is packed with tips and tricks to get the perfect guitar tone, whether live or recorded.
Hopefully you’ll come out on the other side with a much better understanding of how things work, along with taking some of the guesswork out of what can be an intimidating process to begin with.

The three types of microphones used in recording electric guitar
To learn how to record electric guitar, there's no getting around it—you have to know your mics. For the uninitiated, it’s easy to think that ‘a mic is a mic is a mic’. You just plug it in and go—it’s a piece of cake, right?
Nothing could be further from the truth! There are three main types of microphones that are typically used when recording an electric guitar (each with a different construction and design, and each one can yield different results when you compare them against each other):
- Dynamic
- Condenser
- Ribbon
Knowing what each type brings to the party will help you to use the right tool for the job, which in our eyes always tends to be the best way to go. We mean...really...would you use a butter knife as a screwdriver? Of course you wouldn’t...
(...but for those that said ‘yes’ to that; well...yeah—we can only help you out so much…)
To keep your brain from melting as much as possible, we’re going to do our best to keep the tech talk about how these mics work to a level that most normal mortals can understand. It’s tough enough figuring out which one to use, let alone have to take a physics class to figure things out.

Dynamic microphones
A dynamic microphone is among the most simple designs that are found across the different mic types. Sound waves from a source—such as a guitar amp—create pressure against a diaphragm (a thin piece of material that can easily vibrate). These vibrations are then picked up by a coil and magnet configuration, therefore creating a voltage which is translated to an audio signal.
Benefits of using a dynamic mic include:
- The ability to handle high sound pressure levels (SPL’s) without getting damaged, making them ideal for a loud amp in the studio or recording in a live environment
- A simple design that is fairly inexpensive to produce
- No need for any sort of power to operate (i.e., ‘phantom power’)
Some drawbacks of this mic type are:
- The ruggedness of the design may make it not the best choice for capturing delicate or soft sounds
- Does not capture higher frequencies as efficiently as other mic types
One of the most popular examples of a dynamic microphone for recording the guitar is the industry-standard Shure SM57. They are rugged to withstand the abuse that a mic can take with a loud guitar amp in front of it, cheap enough to sound great while not cleaning out your bank account, and they also have a signature frequency response which accentuates high-mids (making it a great choice when trying to cut through a band mix).

Condenser microphones
While it may seem that a dynamic mic would be the best choice for recording an electric guitar, it should be kept in mind that not all tones are full tilt from a ‘rock and roll’ standpoint. Sometimes things are meant to be a little less intense while still being precise.
Here is where a condenser mic comes into the picture. A condenser mic is somewhat similar to a dynamic in that it has a diaphragm that vibrates in reaction to a sound wave, but there is no coil/magnet setup. In this case external power is supplied to the diaphragm itself and a back plate. As the distance between these two components changes due to the vibration, a change in voltage is generated, which creates the overall signal.
Reasons to use a condenser microphone are:
- Environments where the sounds to be recorded are more intricate and detailed, often with low SPL’s
- A great choice when capturing high frequencies is involved
Downsides to this mic category:
- A separate power source is required, which is typically supplied by either phantom power from the audio equipment used or by a battery
- May not be as durable as a dynamic microphone overall
- They can be more expensive...like, a LOT more (potentially in the over $1000 range as compared to an SM57 with a street price of under $100 bucks)
There are a few condenser microphones that are considered among the best for recording an electric guitar, such as the AKG C414 and the Neumann U87. Yes, they cost more, and yes—they typically are a good example of the phrase ‘you get what you pay for’. The performance is there when sound capture precision is the name of the game. That being said, we’d probably recommend to not use them when recording your version of (insert Ted Nugent song of choice) using a Fender Super Twin cranked to 11...
Ribbon microphones
Last—but certainly not least—is the ribbon microphone. Ribbon mics are a cousin to the dynamic mic in that they use a thin and long diaphragm (i.e., the ‘ribbon’), with the main difference being it is suspended between the poles of a magnet instead of using a coil.
The result of this design is a microphone that can capture extremely accurate sounds across a wide frequency range, with warm low end and clear tones from upper registers. For some engineers they are considered the ‘go-to’ mics for recording an electric guitar. They were among the first types of microphones used in the age-old days of radio and they still create a coveted sound in these modern times.
Advantages of using ribbon mics:
- They produce a natural and rich quality of sound that most dynamic and condenser mics may struggle to duplicate
- Ability to capture great detail and nuances when recording softer passages
- No external power required for operation
Things to watch out for:
- The ribbon itself can be extremely fragile, making it important to ‘handle with care’ and not expose the mic to excessive SPL’s
- A high-powered preamp may be required due to relatively low signal strength
- Cost—a good ribbon microphone may be out of budget for many home recording enthusiasts
When talking about the best ribbon mics for recording the guitar, one name typically rises to the top of the list—the Royer 121. It has a long and well deserved reputation for being one of the most accurate sounding microphones to ever visit a recording studio, and it is a top choice for many professional recording engineers.
So which type of microphone is the best for recording electric guitar?
The simple answer to this is: ‘it depends’.
Everything about choosing the right mic comes down to what you are wanting to achieve. The ‘best’ mic is the one that is the right fit for the type of work being done:
- Using cranked Marshalls? A dynamic most likely is the right pick.
- Capturing high-end and detailed passages? Condenser microphones may be in your future.
- Looking for the best all around natural tone? Ribbon mics rise to the top of the pack.
One interesting point to make—there is absolutely nothing saying that you have to be limited to just one mic type. It is an extremely common technique to use different types of microphones at the same time, therefore taking advantage of the benefits that each has to offer.
A great example of this is using an SM57 and a Royer 121 (or a Neumann U87 condenser for that matter). The SM57 has that higher-mid end ‘bite’ that can be prominent, and when it’s mixed with the warmer tone of the 121 it can be sonic nirvana for your recorded guitar sound.

The ‘Art of Mic Placement…’
So you’ve settled on a particular microphone setup that is best suited for your particular application. Game over, right? No more fiddling around with working to get a great tone?
Well...not quite. Along with picking the right mic for the job, another huge factor in how your recorded tone will be is where the mic is placed in relation to the speaker cabinet. The truth is this: in learning how to record electric guitar, having an understanding of how mic placement works can be almost—if not as—important as the kind of mic you selected in the first place.
It may seem easy to just, for example, place an SM57 pointed right at the cone of one of the speakers, then let ‘er rip. But by taking that simple approach, you may be leaving a lot of sonic opportunities on the table.
There are two main factors with how a mic is placed that will have a major impact on the recorded tone: how far away the mic is placed (distance effect), and whether or not it is pointing directly at the speaker itself (‘off axis’ effect).
Distance effect
The best way to explain the distance effect may be this: have you ever used a mic for vocals and got really (like, really) close to it? Basically so close your lips are touching the grill (which means, by the way, no one else needs to use your mic, LOL)? If so, you may have noticed that the sound of your voice seems to have a lot of low end to it.
Enhanced bass response is a key factor of having a mic up close (either touching the speaker cloth or being an inch or so away). Even that SM57 we talked about—not being known for excessive low end for sure—can sound a bit heavy. Try moving the mic back a few inches—you’ll be amazed at how different the sound will be. The bass response will drop, and the overall result may be more ‘normalized’.
Part of that effect may also be due to the presence of ‘room reflections’. As the name implies, the farther away from a cabinet that the mic is, it will have the opportunity to capture sound waves as they reflect off various surfaces in the room.
Just as using several mic types can be an effective recording technique, using a combination of close and distant (ambient) mic placements can create a recorded sound which is full of body. Jimmy Page, notably, tended to use ambient mic placement to great effect over the course of his production of the entire Led Zeppelin catalog.
‘Off axis’ effect
Similar to how sounds can change with distance, the angle at which the mic is directed towards the speaker can make a big difference as well. When a mic is pointed straight on, it is referred to as being ‘on axis’. With an ‘off axis’ approach, the mic is angled away somewhat. The treble tends to roll off, and the resulting sound tends to be warmer with enhanced resonance and bass response.
It’s important to note a distinction here: a mic that is pointing directly at the speaker—but at the edge instead of the center of the cone—is still considered ‘on axis’. Take that same mic and angle it at 45° and you may find the tone has a completely different character.
Overall, the key to successful mic placement might boil down to some trial and error to get it right for your ears. By changing the distance and the axis position, a single mic type can have an entire range of sounds to explore. It’s not uncommon at all for an engineer to develop their own personal preferences for these kinds of setups, making things a bit easier to duplicate a particular recorded tone when called upon to do so.
Placement when using multiple microphones
As we mentioned earlier, it’s not unusual at all to use more than one mic type at the same time. Just as a general rule of thumb, having a dynamic mic up may be the right choice due to it’s ruggedness and ability to handle high SPL’s without breaking a sweat. Ribbons and condensers are typically ‘safer’ when not placed right up against the grill, due to the relative delicacy of their design.
Another great thing about this approach is this: not only can you get the individual benefits of each kind of mic, you also can experiment with the individual placements to further enhance their unique characteristics.
Let’s go back to our previous example of an SM57 (dynamic) with a Royer 121 (ribbon). This is such a popular combination that many retailers offer one of each as a package (even including a mount that was designed to hold both). With this approach, the mics are mounted relatively close to each other—but that’s certainly not the only way to position them..
An alternate approach may be to have the SM57 closer to the speaker while having the 121 pulled a little farther back. Utilizing this approach has several benefits: the 57 tends to be best when used as a close mic, maybe pulled back just enough to roll off the enhanced bass response that can occur with that method while still delivering the upper end it’s known for.
The 121, due to its ability to capture sounds in a more natural manner, may benefit from being placed several inches farther back than the 57. Not only will the warmness of the 121 help to supplement the 57, this technique will allow additional room reflections as well—which can make the recorded tone even more realistic.

Conclusion
Just like the journey guitar players take when they are looking for ‘their’ sound with a guitar and amp, figuring out how to record electric guitar to get that tone onto tape can be another adventure in its own right.
The two key factors that will help the most with getting that sound are considering the different types of microphones along with finding a mic placement setup that may work best for your needs. The key to figuring out how to record electric guitar is finding the ideal mix of these variables that will bring your recorded electric guitar tone to life.
Here’s the bottom line: while what we have talked about today should give you some general guidelines for how to record electric guitar, the biggest rule is that ‘there are no rules’. In the end, you may come across a combination that may be a little ‘out of the box’. But that’s OK! We encourage you to take the time to do some experimentation. Sure, it can be a bit time-consuming, but once you lock onto that ‘right’ mix of variables, then it’s all worth it in the end.
Want even more tips for improving your guitar tone both when recording and playing live? Check out our free Ultimate Guitar Tone Guide.
Other Posts you may like


Guitar Strings Order: How the Guitar is Tuned and Why

Two Handed Tapping: Our Top 8 Tappers of All Time
Which Guitar Strings Wear Your Fret Wire Down More?
What is Nashville Tuning? Its History, Best Guitar Strings & Uses
Guitar Scale Length Explained: String Tension & Playability

What Guitar Strings I Used To Play...
0 Responses
Leave a Reply
Your email address will not be published. Required fields are marked *


