GET FREE SHIPPING ON U.S. ORDERS $25+

How To Change Guitar Strings The Right Way

How To Change Guitar Strings The Right Way

A lot of guitar players simply don’t change their guitar strings often enough. And if they do, they often don’t know how to change guitar strings the right way. Truth is, changing your own guitar strings regularly and properly is one of the many ways you can show your instrument the care it deserves. 

And if you take care to do it the right way every time, you’ll have the satisfaction that you’ve not only done the job yourself, but that you’ve also done it well.

Below, we show you how to change guitar strings in what we think is the simplest, easiest, and best way, so you can get it right, every time. 

But before we get there, we do need to say: there are a number of great ways to change strings, and always good ways to expand upon what we recommend here with other tricks. So even though we say this is “The Right Way,” the truth is, there are several right ways—if you’ve got a way you love, stick with it. But in our opinion, this is the best place to start.

What you’ll need

Obviously, you’ll need new guitar strings. Besides this, you’ll want to have some wire cutters and a towel nearby. Other items that make life easier are a peg winder and a neck cradle, though these are optional. Have your tuner on hand as well. If you can, work on a table, not on your lap sitting on the sofa. Lay your guitar out on its back and make sure that you have enough room to work with before you begin.

How To Change Guitar Strings, Step-by-Step:

1. Unwind the string

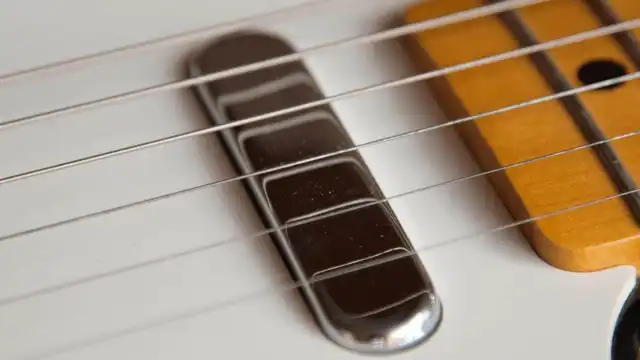
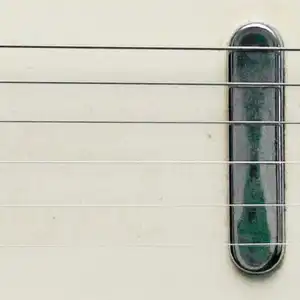
Starting with the high E-string, loosen the tuning peg with the peg winder. You won’t need to unwind the string completely, just enough so that you can manually unwind the string from the peg. This will save wear on your tuning key mechanism. Remove the string from the peg, then from the bridge and toss it in the trash (it’s usually easiest to coil the string once or twice around itself first, so it won’t pop out of the garbage can).

2. String up the new string

String the new E-string into the bridge and pull it over towards the nut, then thread it through the tuning post. At first you’ll want to hold the string above the nut, then pull at the center of the string until there’s about six inches between the string and the fret board. That’s just enough slack for winding. If you leave more slack, you’ll spend days winding up; less slack and you’ll experience tuning instability for the life of the string.

3. Wind to tension and tune

Once you’ve left enough slack, you can begin to wind the string. Make sure you are winding from the top of the peg to the bottom, with a steady speed, not catching the extra string that’s left over. Also, watch that the string is winding on the side of the peg closest to the center of your headstock.

Once you’ve wound up to tension, tune the string a bit to keep the torsion on the neck the same as it was before the string was removed. Bend the excess string behind the tuning peg back out of the way.

Repeat this same process with each string until complete.

4. Stretch out your strings

Anyone who has restrung their own guitar has experienced the brutal two or three days of re-tuning the strings every few minutes. Seems like the guitar just won’t keep a tune. This is because the strings will slowly stretch a bit until they reach their peak torsion. You can get around this constant tuning by stretching the strings right now.

Lay a folded towel over the bridge and hold it down. Take the low E-string and pinch it near the bridge and begin pulling it up, moving up the string towards the nut. You don’t want to pull too much, just enough that you feel the string begin to stretch. Do this with each of the strings. (The towel is optional).

Now you can push down gently on the short lengths of string between the nut and the pegs, again, pre-stretching the string. This entire process of pre-stretching won’t eliminate the need to re-tune entirely, but it will help your strings adjust to the tune a lot quicker.

5. Clip those hanging ends

Besides looking a bit sloppy, those ends hanging off the tuning pegs are sharp and pointy and will prick you when you least expect it. Be neat and trim those ends to about a quarter to an eighth of an inch from the peg. If you really don’t want to get pricked in the future, you can always push the ends down so they are not sticking out, but that’s optional.

Tune up one more time and you’re all set! As with many things, the simplest way is the best way how to change guitar strings.

To get the most life out of your strings, always play your guitar with clean hands, and wipe your strings off with a cloth before you put it up. You’d be surprised how far just a little bit of care will take you in this regard.

______________

We know we’re biased in saying this, but we have some of the best acoustic guitar strings you’ll find. As long as you’re changing strings out, why not try one of our specially design and handwound sets, made here in Music City USA (Nashville, y’all).

And if you’re looking for more great ideas on how to push your playing farther, read our posts on alternate guitar tunings and the thickness of guitar picks (an inexpensive and dramatic way to change your playing style and tone).

Happy Playing!

19 Responses

  1. To stretch my strings I usually grab it at the 12 fret pull it up a bit and let it slap down a few times on each string, is your method safer for the instrument or preferential? It was always a guessing game when it came to how much slack to leave before winding and i hate when the coil looks sloppy so THANK YOU. Can’t wait to get my new sets!

  2. Its good to somtimes take all the strings off at once to clean the frets and fret bord and use fretboard conditioners so the wood don’t dry out . like guitar honey .

    1. Gaaah! NEVER do that!!! All the tension on the neck is relieved at once, and replacing the strings puts all the tension back on again. Not good. Replace them one at a time as to make sure the tension on the neck stays as close to normal as possible.

  3. Although some change 1st string first then down, I have always done reverse. 6th string first (or 12 on twelve string) as the greatest tension are on PLAIN strings.

    1. Hey Michael! It’s not a problem at all if you prefer to change the wound strings first, it won’t mess anything up. That said, you should know that in general the greatest tension are on the wound strings in a set, hardly ever do the plain strings have more tension, unless it’s a lap steel guitar.

  4. Dave Doll Martin Guitar Utube Vid does an excellent demo on how to string it up… I’ve been doing it this way for several years: its easy and makes me want to change strings more often than I used to. Strings never slop out of tune once you stretch’m out.

  5. Don’t throw those strings away! There are organizations that recycle them to less fortunate players.

  6. Changing strings is something I need to do more often but constantly put off. On more than one occasion I made a mess out of them and the tuning never holds. I have a set on the guitar Im using tonight, way past changing. This set stays in tune and is comfortable to my fingers. But you are right, they need to come off. Like guitar playing, practice makes perfect and you cant get good at changing strings if you only do it once or twice a year.

  7. Pull up Scott grove from groovy music on you tube Scott takes some getting use to but his video on how to restring your guitar is awsome. I have been using his way even his stretching the string method for over a year and I have no tuning issues what so ever

  8. Yes a video would be far better in understanding. The part about getting the right amount of slack, the 6 inches part is vague to me about what you mean.

  9. I have a unique process that Ive used for 40+ years. Guess I’ll never change. I wont go into it because it’s , well, wierd and probably overly laborious and wholly unnecessary. But I have a gneral query Id like to hear from others about. A long time ago I must have read somewhere that the winding string of wound strings can slip from the string in the core that it is wound around. Somethign about the tension differetn on the winding string and the core. A recommendation for minimizing this slippage was to put a hard 90 degree or more bend in the string remaining dangling from teh tuning peg. Do this close to the peg before trimming all of the rest of the dangling string above that bend. Now, I do not recall what the consequences of NOT doing this were supposed to be :-). Still I do it most every time, so I have nothing to compare it to. Any thoughts?

    1. I’ve seen this recommendation for round core strings; Stringjoy only uses those on their bass strings. Happy stringing!

        1. Also just an update to this since many years have passed. We do use round cores in our Pure Nickel Broadways, but we do not use them on our bass strings. Didn’t want this older comment to cause any confusion.

  10. “At first you’ll want to hold the string above the nut, then pull at the center of the string until there’s about six inches between the string and the fret board…less slack and you’ll experience tuning instability for the life of the string.”

    Really? Never knew this. I too would love a video. Thanks for the tip!

  11. You should definitely put up a step-by-step video showing the people exactly how it is done, so there won’t be any misunderstandings 🙂

Leave a Reply

Your email address will not be published. Required fields are marked *